What RV Owners Need to Know About DIY Solar
Share
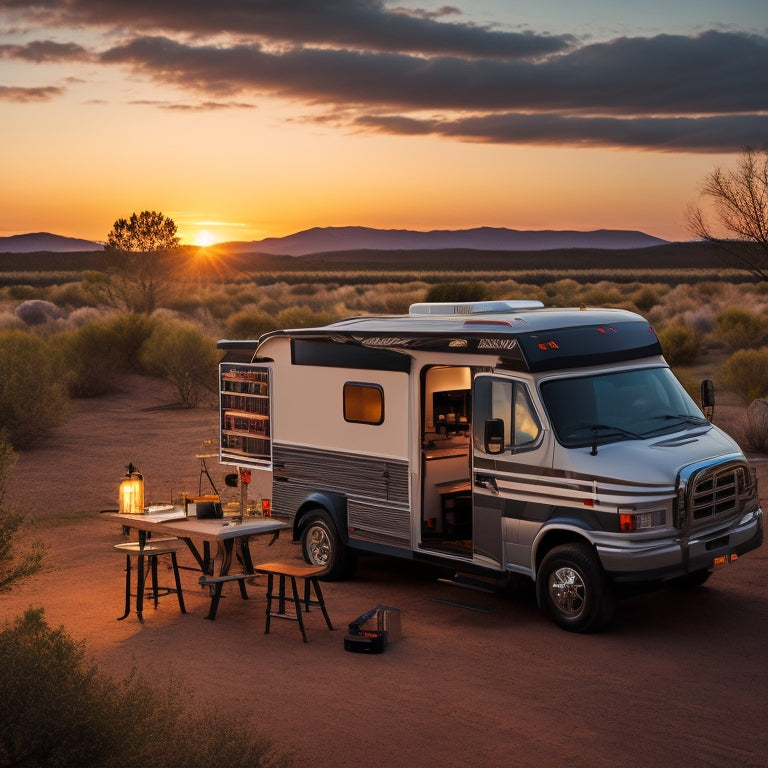
When designing a DIY solar power system for your RV, you'll need to calculate your daily energy requirements, determining total energy needs and sizing your solar panel array and battery bank accordingly. Consider panel efficiency, heat resistance, and budget-friendly options for reliable power. Properly install and secure your solar panels, choosing the right mounts for weather resistance. Don't forget to select the right batteries, considering Depth of Discharge and cycle count. With a well-designed system, you can increase your off-grid camping time. Now, learn how to overcome common DIY challenges and troubleshoot solar panel issues to maximize your solar power generation.
Key Takeaways
• Determine your RV's daily energy requirements to accurately size your solar panel array and battery bank for reliable power.
• Choose solar panels with high efficiency and heat resistance, considering budget-friendly options for reliable power.
• Properly install solar panels at an optimal angle and tilt to maximize energy production, securing mounts for weather resistance.
• Select a suitable battery considering Depth of Discharge and cycle count, and regularly check battery health indicators to ensure longevity.
• Implement a monitoring system to track energy production and consumption, ensuring efficient energy flow and identifying potential issues promptly.
Understanding RV Solar Power Needs
When sizing a solar power system for your RV, you need to calculate your total daily energy requirements in watt-hours (Wh) to make sure you have enough power to run your appliances and devices. This calculation is vital to achieve energy independence while on the road.
To get started, make a list of all the devices you'll be powering, including lights, laptops, and refrigerators. Next, determine the wattage of each device and the number of hours you'll use them daily. Multiply these values to get the total daily energy requirement in Wh.
For example, if you have a 20W laptop that you'll use for 4 hours a day, your daily energy requirement would be 80Wh. Add up the energy requirements for all your devices to get your total daily energy needs.
This calculation will help you determine the size of the solar panel array and battery bank you'll need to achieve energy independence. By accurately sizing your solar power system, you'll be able to enjoy the freedom and flexibility that comes with generating your own clean energy on the road.
Choosing the Right Solar Panel
When selecting the right solar panel for your RV, you'll want to take into account the panel's efficiency, as it directly affects how much power you can generate from a limited roof space.
You'll be relieved to know that budget-friendly options exist, offering a balance between performance and cost.
Panel Efficiency Matter
Your solar panel's efficiency greatly impacts how much power you can generate from the same roof or surface area, making it an important consideration when selecting the right panel for your RV.
When it comes to efficiency, there are a few key factors to keep in mind.
Here are three key aspects to keep in mind:
-
Heat Resistance: High-efficiency panels often come with built-in heat resistance, which reduces energy loss and guarantees consistent performance even in hot temperatures.
-
Cell Technology: Look for panels with advanced cell technology, such as monocrystalline or bifacial cells, which offer higher efficiency rates and better low-light performance.
-
Temperature Coefficient: A lower temperature coefficient means the panel will perform better in extreme temperatures, ensuring that you get the most power from your panel.
Budget-Friendly Options Exist
Fortunately, budget-friendly solar panels can still provide a reliable source of power for your RV. By understanding what to look for, you can find an affordable option that meets your energy needs.
When cost-cutting is a priority, consider panels with lower efficiencies, which often come at a lower price point. While they may not generate as much power per hour, they can still provide a significant eco-savings for your RV.
Look for panels with a lower wattage output, typically in the 100-200W range, which can be a cost-effective solution. Additionally, consider purchasing a smaller solar panel system or a single panel, which can be more affordable than a larger system.
Determining Your Energy Requirements
As you prepare to install a solar panel system in your RV, it's crucial to determine your energy requirements to make sure you're generating enough power to meet your needs.
To do this, you'll need to examine your energy usage patterns, considering factors like the appliances you use, how often you use them, and the amount of power they consume.
Energy Usage Patterns
To determine your energy requirements, you need to understand your daily energy usage patterns, including the types and numbers of appliances you'll be powering, their individual wattage ratings, and the frequency and duration of their use. This understanding is vital in determining your power consumption and energy habits.
Take a closer look at your daily routine and identify the appliances you use frequently. Ask yourself:
-
How many lights do I use, and for how long?
-
Do I need to power a refrigerator or a laptop, and for how many hours?
-
How often do I watch TV or use my microwave, and for what duration?
Calculating Daily Needs
You'll need to calculate your daily energy requirements by determining the total watt-hours (Wh) consumed by your appliances. This involves multiplying the wattage rating of each device by the number of hours it's used per day. This calculation is important in determining the size of your solar panel system.
To accurately calculate your energy needs, you'll need to track your energy consumption habits. Start by making a list of all the appliances you use in your RV, including lights, refrigerators, and laptops. Note the wattage rating of each device, which can usually be found on the manufacturer's label or in the user manual.
Next, estimate the number of hours each device is used per day. This information will help you determine your total daily energy consumption in watt-hours. Energy tracking tools, such as energy monitors or apps, can also help you monitor your energy usage and identify areas for improvement.
Sizing Your Solar Panel System
Determine your RV's power requirements by calculating your daily energy usage in watt-hours (Wh) to accurately size your solar panel system. This calculation is essential to guarantee your system can meet your energy demands. You don't want to end up with a system that's too small or too large for your needs.
To size your system correctly, consider the following:
-
Peak sun hours: Calculate how many peak sun hours your location receives per day. This will help you determine the required solar panel wattage.
-
Energy efficiency: Consider the efficiency of your appliances and lighting to minimize energy waste.
-
System complexity: A more complex system may be necessary if you have multiple energy-hungry appliances or need energy scalability for future upgrades.
Mounting and Installing Solar Panels
When mounting and installing solar panels on your RV, you'll need to take into account several critical factors to guarantee peak performance and safety.
You'll want to determine the ideal panel angle and tilt to maximize energy production, secure the mounts to withstand various weather conditions, and carefully select wiring and connectors to minimize energy loss.
Panel Angle and Tilt
Optimizing your solar panel's angle and tilt is crucial, as even a 10-degree deviation from the ideal angle can result in a 2-3% loss in energy production. To achieve peak inclination, consider the following factors:
-
Latitude: Adjust the tilt based on your RV's location. For example, if you're in a region with a higher latitude, you'll want a steeper tilt to compensate for the lower sun angle.
-
Roof orientation: Make sure your solar panels are installed perpendicular to the direction of the sun's rays. If your RV's roof isn't aligned with the sun's path, adjust the panel's tilt accordingly.
-
Seasonal adjustments: Make changes to the tilt every 2-3 months to account for the changing sun angle throughout the year.
Securing the Mounts
With your solar panels optimized for peak energy production, you're now ready to secure them to your RV's roof using a sturdy mounting system that can withstand various environmental conditions.
You'll want to choose from a range of mounting options, including tracked, fixed, and adjustable mounts. Tracked mounts allow for maximum flexibility, while fixed mounts provide a more permanent solution. Adjustable mounts offer a compromise between the two.
Regardless of the mounting option you choose, it's crucial to make sure the system is securely fastened to your RV's roof to mitigate security risks. A well-secured system will prevent theft, damage, and potential electrical hazards.
Consider the weight and size of your solar panels, as well as the material and construction of your RV's roof, when selecting the mounting system.
Wiring and Connectors
Now that your solar panels are securely mounted, you'll need to connect them to your RV's electrical system using high-quality wiring and connectors that can handle the electrical current generated by your solar array. This is a critical step, as improper wiring can lead to reduced system performance, overheating, or even electrical fires.
When selecting wiring, consider the following key factors:
-
Wire gauge: A thicker wire gauge (e.g., 10 AWG) can handle higher currents and reduce voltage drop, ensuring your solar array operates efficiently.
-
Connector types: Choose connectors that are specifically designed for solar applications, such as MC4 or Solarlok, which provide a secure and weather-tight connection.
-
Cable management: Organize your wiring neatly to prevent damage, reduce clutter, and maintain easy maintenance.
Wiring and Electrical Connections
You'll need to connect your solar panel array to your RV's electrical system, which demands a thorough understanding of wiring and electrical connections to guarantee safe and efficient energy transfer. A well-designed electrical connection system is essential to prevent voltage drops, electrical shocks, and other safety hazards.
| Component | Function | Considerations |
|---|---|---|
| Grounding System | Ensures safe voltage levels | Must be properly sized and connected |
| Wire Sizing | Carries electrical current | Must be sized to handle maximum current |
| Circuit Protection | Prevents electrical overloads | Fuse ratings must match circuit requirements |
| Busbar Design | Distributes electrical power | Must be designed for efficient energy transfer |
To ensure a safe and efficient connection, you'll need to take into account wire sizing, circuit protection, and busbar design. A well-designed grounding system is also vital to prevent electrical shocks. By understanding these components and their considerations, you can create a safe and efficient electrical connection system for your RV's solar panel array.
Battery Selection and Maintenance
Selecting the right battery for your RV's solar-powered electrical system is essential, as it directly impacts the overall performance, efficiency, and lifespan of your setup. When choosing a battery, consider the following key factors:
-
Depth of Discharge (DOD): Look for batteries with a high DOD, as they can handle deeper discharges without compromising their health.
-
Cycle Count: Opt for batteries with a high cycle count, which indicates the number of charge-discharge cycles they can handle before capacity degradation.
-
Type and Chemistry: Decide between Flooded, AGM, or Lithium-ion batteries, each with their own advantages and disadvantages.
Proper battery maintenance is important to ensure your battery's health and extend its lifespan. Regularly check your battery's state of charge, voltage, and temperature to prevent overcharging or undercharging.
Avoid deep discharging, as it can reduce your battery's cycle count and overall health.
Charging and Monitoring Systems
How do you guarantee that your solar panels are charging your batteries efficiently and safely, while also keeping tabs on your system's performance?
The answer lies in a well-designed charging and monitoring system. This is where system integration comes into play, ensuring that your solar panels, charge controller, and batteries work seamlessly together.
A high-quality charge controller is essential, as it regulates the flow of energy from your solar panels to your batteries, preventing overcharging or undercharging. Additionally, a monitoring system allows you to track your system's performance, providing valuable insights into power generation, consumption, and battery health.
With power tracking, you can identify areas of inefficiency and make data-driven decisions to optimize your system. By integrating these components, you'll be able to maximize your solar power generation, reduce energy waste, and enjoy a reliable and efficient off-grid experience.
Overcoming Common DIY Challenges
As you embark on your DIY solar installation, you're likely to encounter some common challenges that can stall your project or compromise its performance. Don't let DIY frustrations turn into solar nightmares! Be prepared to overcome these common obstacles:
-
Incorrect wire sizing: Using wires that are too small can lead to energy loss and even electrical fires. Make sure you choose the right gauge wire for your system.
-
Inadequate mounting and grounding: Improperly secured panels can be damaged or even stolen. Ensure that you securely fasten your panels and ensure proper grounding to prevent electrical shock.
-
Insufficient battery capacity: Underestimating your energy needs can lead to drained batteries and system failure. Calculate your energy requirements accurately to select the right battery size.
Troubleshooting Solar Panel Issues
Identifying the root cause quickly is essential when your solar panel system's performance drops, in order to minimize energy losses and potential damage. When troubleshooting, you'll want to check for common issues that can impact performance.
One common culprit is voltage drops, which can occur due to faulty wiring or corrosion. Check your connections and wiring for signs of wear or damage.
Hot spots on your solar panels can also reduce efficiency. Inspect your panels for debris, dirt, or shading that may be causing uneven heat distribution.
Faulty diodes can also lead to performance issues. Check your diode configuration and replace any faulty ones.
Don't overlook loose connections, which can cause power loss and even short circuits. Make sure all connections are secure and tightened properly.
Frequently Asked Questions
Can I Mix Old and New Batteries in My RV Solar System?
When you mix old and new batteries, you risk voltage mismatch, jeopardizing your RV's solar system. It's essential to prioritize battery health by using identical, equally aged batteries to guarantee peak performance and prevent system failures.
How Often Should I Clean My Rv's Solar Panels?
You should clean your RV's solar panels every 2-3 months to guarantee top energy production, as dust accumulation reduces efficiency; perform regular panel inspections to detect issues and maintain peak performance.
Can I Use a Generator to Charge My Rv's Solar Battery?
You can use a generator to charge your RV's solar battery, but make sure the generator's sizing matches your battery's capacity, and verify inverter compatibility to avoid damaging your system or compromising efficiency.
Will Solar Panels Still Charge on Cloudy Days?
On sunny days, your solar panels soak up energy like a sponge, but what about cloudy days? Yes, they'll still charge, albeit slowly, as energy harvesting efficiency drops with increased cloud cover, but don't worry, you'll still generate some power.
Can I Add More Solar Panels to My Existing System Later?
You can expand your existing solar system by adding more panels later, a process known as system expansion, and even upgrade to more efficient panels, aka panel upgrades, as your energy needs evolve.
Related Posts
-

Advantages of Solar Generating Systems Over Traditional Energy
Solar generating systems provide several key advantages over traditional energy sources. You'll experience lower long...
-

Solar Powered Lights for Sustainable Home Decor
Solar-powered lights offer a stylish and eco-friendly way to enhance your home decor. They capture sunlight, converti...
-

Cost of Home Solar Battery
You're looking to invest in a home solar battery to reduce your grid reliance, but you're curious about the cost. The...


