5 Essential Tips for Home DIY Energy Kit Installation
Share
You're about to install a DIY energy kit at home, and that's a great step towards harnessing renewable energy. First, assess your energy needs by conducting an energy audit and analyzing your consumption patterns. Next, choose an installation site with sufficient sunlight or wind, ensuring unobstructed exposure. Prepare your roof and wiring by inspecting for damage and ensuring compliance with local wiring codes. Connect your solar panels safely, following the manufacturer's instructions, and perform voltage checks. Finally, test and inspect your system, calibrating it for best energy production. Now, get ready to optimize your energy kit for maximum performance.
Key Takeaways
• Conduct an energy audit to determine your energy needs and ensure your DIY energy kit is correctly sized for your home.
• Choose an installation site with sufficient sunlight or wind, and guarantee unobstructed airflow or sunlight exposure for optimal energy production.
• Inspect your roof for damage, ensure your wiring meets local Wiring Code Compliance standards, and verify your electrical system can handle added power output.
• Connect solar panels securely, align and space them for optimal energy production, and connect them to wiring routes following manufacturer's instructions.
• Test and inspect your system, perform system calibration, and initiate performance monitoring in real-time to ensure safe and efficient operation.
Assess Your Energy Needs First
Before investing in a DIY energy kit, determine how much energy you need to produce by tracking your daily energy consumption, identifying areas of inefficiency, and calculating your total energy requirements. This essential step will help you size your energy kit correctly, ensuring you generate enough power to meet your needs.
To accomplish this, you'll need to conduct an energy audit using specialized tools. These Energy Audit Tools will help you analyze your Historical Consumption Patterns, revealing opportunities to optimize your energy usage. By examining your past energy usage, you'll identify patterns and areas where you can cut back.
This data will enable you to calculate your total energy requirements, ensuring your DIY energy kit is tailored to your specific needs. Don't skip this step, as an incorrectly sized energy kit can lead to inefficient energy production and wasted resources.
Take the time to assess your energy needs, and you'll be rewarded with a DIY energy kit that meets your energy demands effectively and efficiently.
Choose the Right Installation Site
You'll need to identify a location for your DIY energy kit that receives sufficient sunlight or wind, depending on the type of renewable energy you're harnessing, and guarantees unobstructed airflow or sunlight exposure. This is important to ensure peak energy production.
Conduct a thorough shading analysis to determine the best spot, taking into account any obstacles that might cast a shadow on your kit. Consider the surrounding landscape, including trees, buildings, and other structures that could impact energy output.
Remove any obstructions, such as trimming tree branches or relocating antennas, to ensure unobstructed airflow or sunlight exposure. This will maximize energy production and reduce maintenance costs in the long run.
Additionally, consider the kit's orientation and tilt to optimize energy harvesting. By choosing the right installation site, you'll be able to generate clean energy efficiently and effectively, making the most of your DIY energy kit investment.
Prepare Your Roof and Wiring
Safeguard your roof by inspecting it for damaged, missing, or loose shingles, and repairing or replacing them as needed, to guarantee a safe and stable surface for your DIY energy kit installation. A comprehensive roof inspection is vital to make sure you have a secure and reliable base for your energy kit.
Create a Roof Inspection Checklist to guide your evaluation, paying close attention to areas around chimneys, vents, and skylights. Check for signs of wear, such as curled or buckled shingles, and address any issues promptly.
Next, inspect your wiring to ensure it meets local Wiring Code Compliance standards. Verify that your electrical system can handle the added power output from your energy kit. Consult your local building codes and regulations to make certain compliance. Familiarize yourself with the wiring diagram and take note of any necessary upgrades or modifications.
Connect the Solar Panels Safely
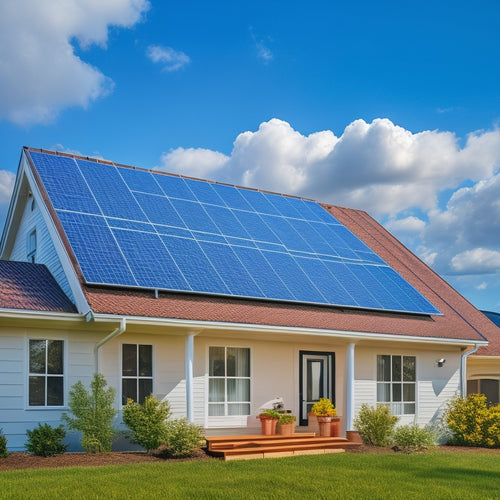
With your roof and wiring prepared, it's time to connect the solar panels, starting by confirming the panels are securely fastened to the roof-mounted racking system. Make sure the panels are properly aligned and spaced to optimize energy production.
Next, connect the solar panels to the wiring routes, taking care to adhere to the manufacturer's instructions and local electrical codes. Perform voltage checks to confirm the system is operating within safe parameters.
You should also verify that the wiring routes are securely fastened to the roof and walls to prevent damage from wind or weather. As you connect the panels, double-check that all electrical connections are secure and meet the required safety standards.
Remember to handle the solar panels with care, as they can be fragile and prone to damage. By following these steps, you'll be able to securely connect your solar panels and start generating clean energy for your home.
Test and Inspect Your System
Now that your solar panel system is connected, turn it on and start monitoring its performance to confirm it's generating electricity as expected. This critical step guarantees your system is functioning correctly and efficiently.
Begin by performing a system calibration to adjust the settings for best energy production. Next, initiate performance monitoring to track your system's output in real-time. This data will help you identify any potential issues or areas for improvement.
As you monitor your system's performance, pay attention to key metrics such as energy output, voltage, and current. Compare these readings to the manufacturer's specifications to make sure your system is meeting its expected performance benchmarks.
If you notice any discrepancies, consult your user manual or contact a professional for assistance. By testing and inspecting your system, you'll be able to identify and address any issues promptly, ensuring your DIY energy kit installation operates at peak efficiency and maximizes your energy savings.
Frequently Asked Questions
Can I Install a DIY Energy Kit on a Rented Property?
Before installing a DIY energy kit, you should check your renter's rights and obtain your landlord's approval in writing, ensuring you understand any restrictions or requirements to avoid potential disputes or lease violations.
Do I Need Permission From My Homeowner's Association?
Did you know 1 in 5 homeowners belong to an HOA? When installing a DIY energy kit, you'll need to review your HOA rules and community restrictions to guarantee compliance, as they may have specific regulations governing exterior alterations.
Can I Mix and Match Components From Different Manufacturers?
When mixing and matching components from different manufacturers, you'll face warranty implications, compatibility issues, and technical hurdles, compromising quality control and brand loyalty, so it's important to guarantee seamless integration and thorough testing to avoid costly mistakes.
How Do I Handle Snow or Debris on My Solar Panels?
When winter hits, you'll need to prioritize Winter Maintenance to guarantee peak energy harvesting; regularly inspect and clean your panels to remove snow or debris, and consider investing in automated Panel Cleaning systems for efficiency.
Are DIY Energy Kits Compatible With Existing Electrical Systems?
"When you're 'burning the midnight oil' to get your DIY energy kit up and running, rest assured that most kits are compatible with existing electrical systems, as long as they're Grid Tie certified, meeting Electrical Code standards for seamless system integration, power flow, and voltage regulation."
Related Posts
-

Cost of Solar Panel Installation
You can expect to pay between $15,000 and $30,000 or more for a typical solar panel installation, depending on the sy...
-

Off Grid Solar Batteries
As you shift to off-grid living, you'll rely on high-performance solar batteries to store excess energy generated by ...
-

Top Solar Powered Camping Fans for Camping Enthusiasts
If you're a camping enthusiast, a solar-powered fan can be a transformative element for your outdoor experience. Thes...


